Setup a Email server - Linux
Simple Mail Transfer Protocol (SMTP) is an Internet standard for electronic mail (email) transmission. SMTP by default uses TCP port 25. The protocol for mail submission is the same, but uses port 587. Sendmail was one of the first mail transfer agents to implement SMTP.
Over time, as BSD Unix became the most popular operating system on the Internet, sendmail became the most common MTA (mail transfer agent). In 1999 Postfix (released in December 1998) starts to take a lot of adoption because its performance, easy configuration and most important the security that was one thing that sendmail struggle in some versions. Some other popular SMTP server programs include qmail, Exim, etc.
Postfix
Lets get started by installing postfix on a machine:
$ sudo apt-get update
$ sudo apt-get install postfix -y
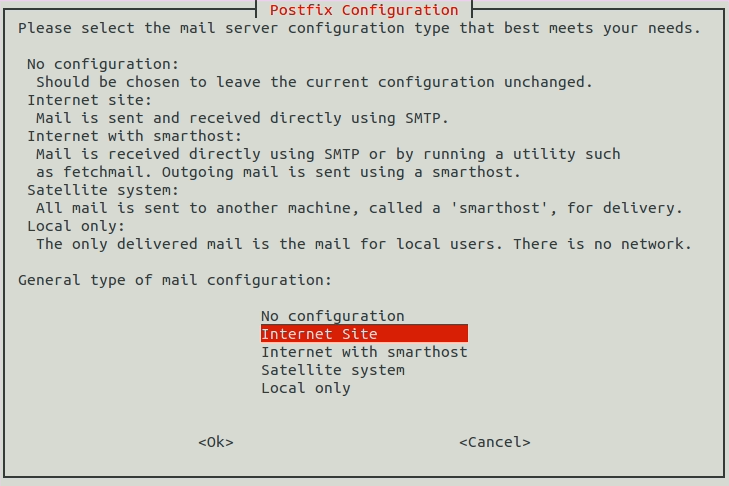
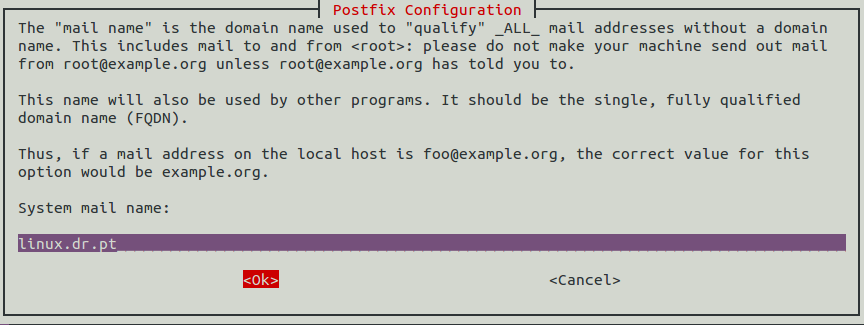
On installation process choose “Internet Site” and them type a mail name of your choice.
Now you just need to change somethings on postfix configuration file, follow the next steps:
$ cd /etc/postfix
$ sudo nano main.cf
Go to the end of file and make the necessary changes to look like the next code:
1
2
3
4
5
6
7
8
9
10
11
12
13
14
smtpd_relay_restrictions = permit_mynetworks permit_sasl_authenticated defer_unauth_destination
myhostname = ubuntu # your machine hostname
alias_maps = hash:/etc/aliases
alias_database = hash:/etc/aliases
myorigin = /etc/mailname
mydestination = linux.dr.pt, localhost.localdomain, localhost
relayhost =
mynetworks = 127.0.0.0/8 10.0.0.0/24 # your network
mailbox_size_limit = 0
recipient_delimiter = +
inet_interfaces = all
inet_protocols = ipv4 # just use ipv4 protocol
home_mailbox = Maildir/ # define the root of mailbox
Just save the file (CTRL+X,Y,Return) and restart postfix with this command: $ sudo service postfix restart.
Dovecot
At this point you have postfix configured and running. Now lets add IMAP and POP3 protocols to our mail server. Dovecot is an open-source IMAP and POP3 server for Linux/UNIX-like systems released in July 2002.
Dovecot developers primarily aim to produce a lightweight, fast and easy-to-set-up open-source mail server. According to Openemailsurvey Dovecot has an installed base of over 2.9 million email servers all over the world and a global market share of 57% of all IMAP servers. Next steps are install dovecot-imap, dovecot-pop3 and configure them.
$ sudo apt-get install dovecot-imapd dovecot-pop3d -y
When it prompts to if you want to create a self-signed SSL certificate, choose yes and on next screen type the mail name that you choose a few steps before.
$ cd /etc/dovecot
$ sudo nano dovecot.conf
Make this changes:
1
2
3
4
5
6
# Add this lines
protocols = imap pop3
listen = *
# Uncomment this line
login_greeting = Dovecot ready.
$ cd conf.d
$ sudo nano 10-auth.conf
1
2
3
4
5
# Uncomment this line
disable_plaintext_auth = yes
# Add login on this line
auth_mechanisms = plain login
$ sudo nano 10-mail.conf
1
2
# Change this line
mail_location = maildir:~/Maildir
$ sudo nano 10-master.conf
1
2
3
4
5
6
7
8
9
10
11
12
13
14
15
16
17
18
19
20
21
22
23
24
25
26
service imap-login {
inet_listener imap {
port = 143 # Uncomment this line
}
inet_listener imaps {
#port = 993
#ssl = yes
}
}
service pop3-login {
inet_listener pop3 {
port = 110 # Uncomment this line
}
inet_listener pop3s {
#port = 995
#ssl = yes
}
}
# Make the necessary changes to the next lines
unix_listener auth-userdb {
mode = 0600
user = postfix
group = postfix
}
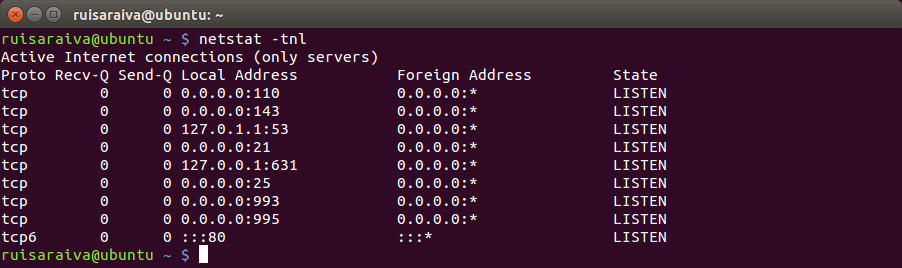
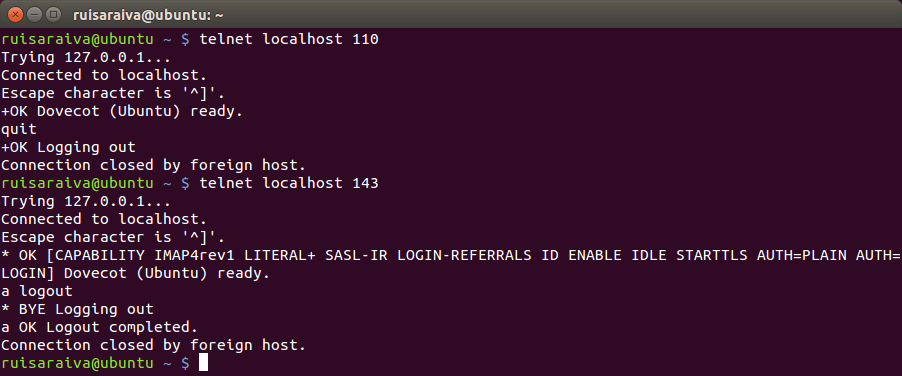
With all this changes saved, you just need to restart dovecot with this command: $ sudo service dovecot restart. By executing the command $ netstat -tnl you can see all machine ports that are listening:
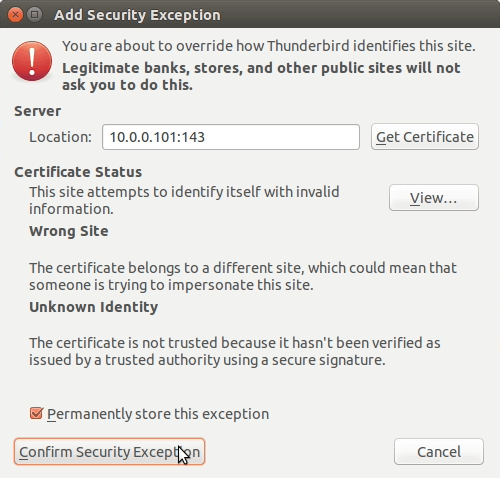
Now lets test this mail server with a email client. There are a lot of programs available on the internet but the most popular for linux are Thunderbird, Evolution, Geary and Sylpheed.
I choose Thunderbird because when you’re dealing with hundreds or thousands of emails every day, speed is a primary concern and this email client delivers. So open Thunderbird and configure your email account:
Note that server hostname is relative to the machine that is running the mail server. So if you are setting up Thunderbird on the mail server machine, you can use 127.0.0.1. If not you need to input the IP of the mail server machine.

SquirrelMail
SquirrelMail is a standards-based webmail package written in PHP. It includes built-in pure PHP support for the IMAP and SMTP protocols, and all pages render in pure HTML 4.0 (with no JavaScript required) for maximum compatibility across browsers.
It has very few requirements and is very easy to configure and install. Next step is to take our mail server to “next level” installing SquirrelMail test on browser:
$ sudo apt-get install squirrelmail
$ sudo cp /etc/squirrelmail/apache.conf /etc/apache2/sites-available/squirrelmail.conf
$ sudo nano /etc/apache2/sites-available/squirrelmail.conf
1
2
3
4
5
# Uncomment the next lines
<VirtualHost *:80> # change 1.2.3.4 to *:80
DocumentRoot /usr/share/squirrelmail
ServerName mail.linux.dr.pt
</VirtualHost>
$ sudo a2ensite squirrelmail
$ sudo service apache2 restart
As we don’t have a DNS server on the system yet, just add the following line to your hosts file:
$ sudo nano /etc/hosts
1
2
# Add this line to the file
127.0.0.1 mail.linux.dr.pt
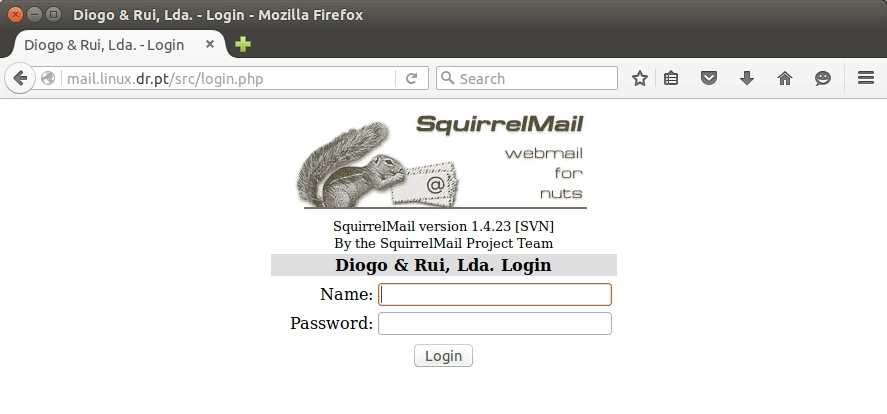
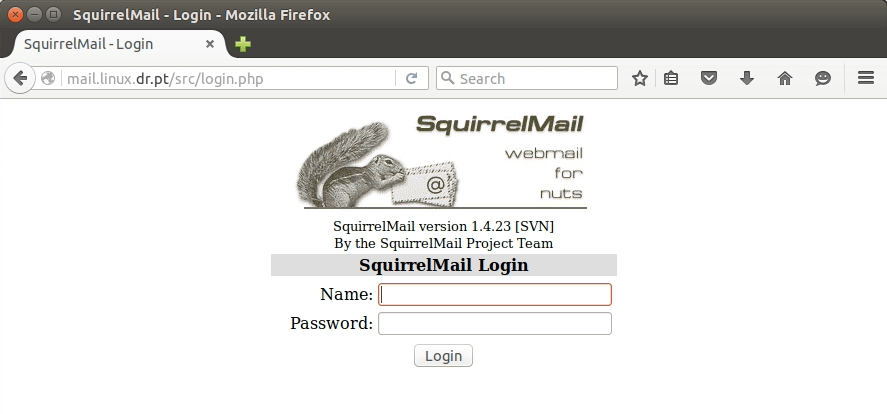
Now you are good to go test SquirrelMail on a web browser and type this url: mail.linux.dr.pt.
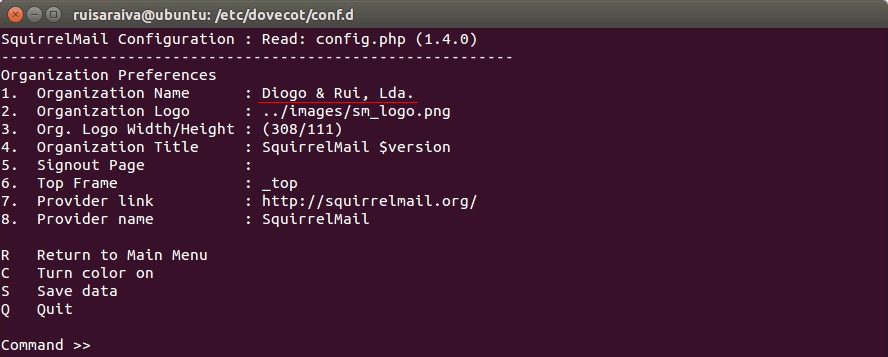
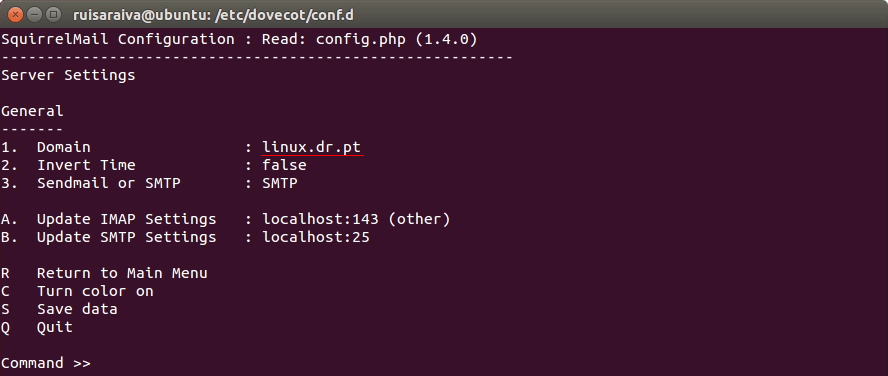
One more step to make SquirrelMail page show our mail server name:
$ sudo squirrelmail-configure